

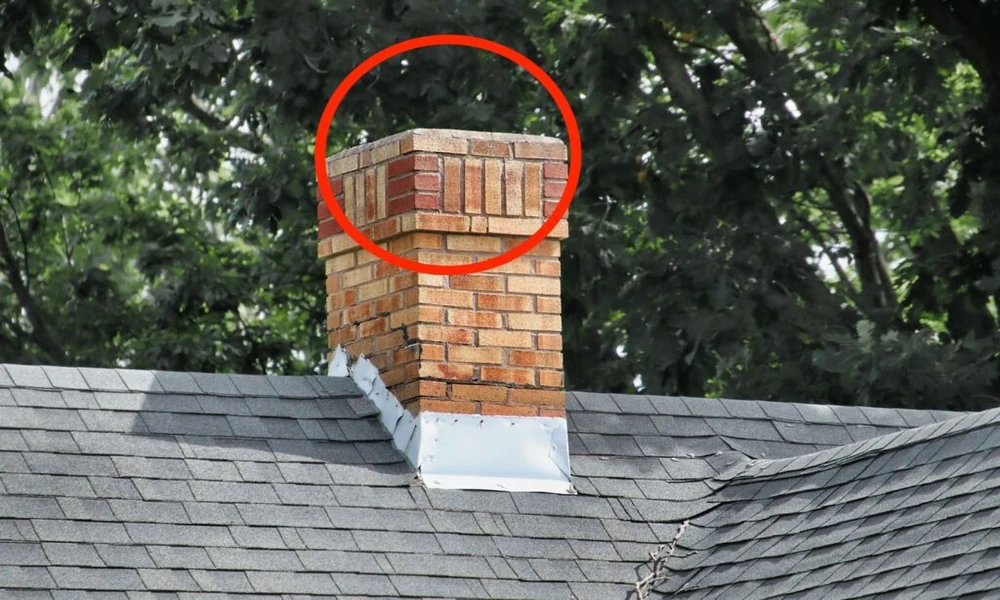
Most homeowners don’t think about the top of their chimney until something goes wrong. A bird nests in the flue. Rain streaks down the inside of the firebox. Or a neighbor mentions that sparks from your roof worried them last summer. All three of those problems trace back to one missing or failing piece of metal: the chimney cap.
A chimney cap is a simple lid that sits on top of the flue. It covers the opening, sheds water, and keeps animals and debris out. That’s the short version. The longer version is that the cap you choose, and how it gets attached, shapes how well your chimney breathes for the next twenty years. Get it right and you’ll forget it exists. Get it wrong and you’ll be up on the roof again next spring.
This guide walks through what a cap actually does, how to size one, which materials hold up, and when the job is worth handing to someone with a truck full of copper and a brake.
What Does a Chimney Cap Actually Do?
Think of the cap as a raincoat and a screen door combined. The solid top plate blocks precipitation from falling straight into the flue. The mesh sides let smoke and exhaust escape while keeping squirrels, raccoons, and birds from moving in.
Those two jobs matter more than people expect. Water is the single biggest destroyer of masonry chimneys. It soaks into brick and mortar, freezes, expands, and slowly cracks the structure apart. A cap won’t fix a chimney that’s already spalling, but it stops the damage from starting in the first place.
Wildlife is the other issue. Chimneys look like excellent caves to a lot of animals, and a nest packed into a flue is a fire hazard and a carbon monoxide risk once you light a fire. Fire safety guidance from the National Fire Protection Association treats clear, unobstructed flues as a baseline requirement, and a proper cap with quarter inch or half inch mesh keeps that clearance intact without blocking airflow.
Sparks are the third job, and the one people forget. A cap with a spark arrestor screen catches embers before they land on a dry shake roof or a pile of leaves in the gutter. If you live anywhere with a real wildfire season, that screen earns its keep.
How to Size a Chimney Cap Correctly
Sizing is where most do it yourself jobs go sideways. A cap that’s too small won’t fit over the flue tile. A cap that’s too large flaps in the wind and can tear its own mounting screws loose.
You need three measurements, and you take all of them at the very top of the chimney:
- Outside length and width of the flue tile or the chase top, measured edge to edge.
- Inside dimensions of the hole you’re covering, if you’re fitting a cap with a lip that drops inside.
- Number of flues, since a multi flue chimney needs one cap that spans everything or a set of individual caps.
Then decide between single flue and multi flue. A single flue cap sits on one tile and looks tidy on a simple fireplace chimney. A multi flue or chase cover spans the whole masonry crown or a factory built fireplace chase, which means fewer seams and less water finding its way between the flues.
Mounting style matters too. Most caps attach with screws drilled into the flue tile itself, which is why you want the cap body to sit at least a couple of inches above the tile rim. That gap lets exhaust clear the mesh in a downdraft without pulling smoke back into the firebox.
Picking a Material That Survives Real Weather
Galvanized steel is the budget answer. It’s affordable, it’s fine for a decade or so in a mild climate, and it looks like what it is: a utility part. In places with hard freeze and thaw cycles, the zinc coating eventually gives up and the cap starts to rust through.
Stainless steel costs more and lasts much longer. It shrugs off acid rain, creosote residue, and salt air, which is why coastal and mountain homeowners tend to go that direction. If you’re only doing this once, stainless is the safer bet.
Copper is the one people fall in love with. It starts bright and shifts to a soft brown and eventually a green patina, and it will very likely outlive the roof it sits on. You’ll pay for it. My honest take: if your house has any architectural character at all, copper is worth the extra money because you’re buying something that looks intentional rather than bolted on.
Weather drives the decision as much as material does. Freeze and thaw cycles, heavy snow loads, and wind driven rain punish a cheap cap fast. Climate data from the National Weather Service shows how wildly precipitation and freeze patterns vary across regions, so a cap that works fine in a dry climate may need heavier gauge metal somewhere with long winters.
Why Custom Caps Beat Off the Shelf Most of the Time
Big box caps come in a handful of sizes and one or two finishes. If your chimney happens to match one of those sizes, great. Most don’t.
Custom fabrication solves the sizing problem and the looks problem at once. You can spec the footprint to your exact crown, choose the panel style, and pick a finish that matches your house instead of fighting it. Homeowners in older neighborhoods with irregular masonry almost always end up here, because nothing manufactured fits a chimney built in 1935.
Three styles cover most of what people want. Standing seam caps use raised vertical lines that add texture and structural stiffness, and they read nicely on farmhouse and traditional homes. Flush panel caps present a flat, quiet face that suits modern and minimalist architecture. Truly custom caps match a historical profile, a curved chimney, or a color pulled from the siding. If you’re weighing those options for a northern home, the custom work offered through Herzog Roofing’s chimney cap installation service is built in house from galvanized steel or copper, which is the kind of thing you want a fabricator involved in rather than a shelf.
A Quick Checklist Before You Buy
Run through this before you spend money:
- Measure the flue tile outside dimensions at the crown, not from the ground with binoculars.
- Count the flues and decide single versus multi flue.
- Confirm the mesh size, half inch is standard, quarter inch if you have small birds or heavy spark concerns.
- Check the clearance between the cap top and the flue rim, two inches minimum.
- Verify the mounting method works with your flue material, tile, metal, or chase.
- Factor snow and wind exposure into your gauge and material choice.
- Look at the roofline from the street before you choose a finish. You’ll see it every day.
If you’re not comfortable on a steep roof or your chimney crown is cracked, stop there. That’s a job for someone with fall protection and a ladder that reaches.
When to Call a Pro Instead
Chimney cap work looks small and isn’t. You’re on a roof, often in shoulder season when shingles are slick, working with sharp metal edges and a masonry crown that may not be level. Falling is the real risk, and so is a cap that leaks because it was mounted into crumbling mortar.
A pro will check the crown while they’re up there, which is the part most homeowners skip. A cracked crown lets water in below the cap, and no amount of copper on top fixes that. You want someone who notices it and tells you.
Nobody lies in bed at night thinking about the top of their chimney, and that’s exactly the point. Water is patient, animals are persistent, and the fix costs a fraction of what repointing a chimney does. Look at your roofline this week. If there’s a bare flue tile up there, that’s your answer.
